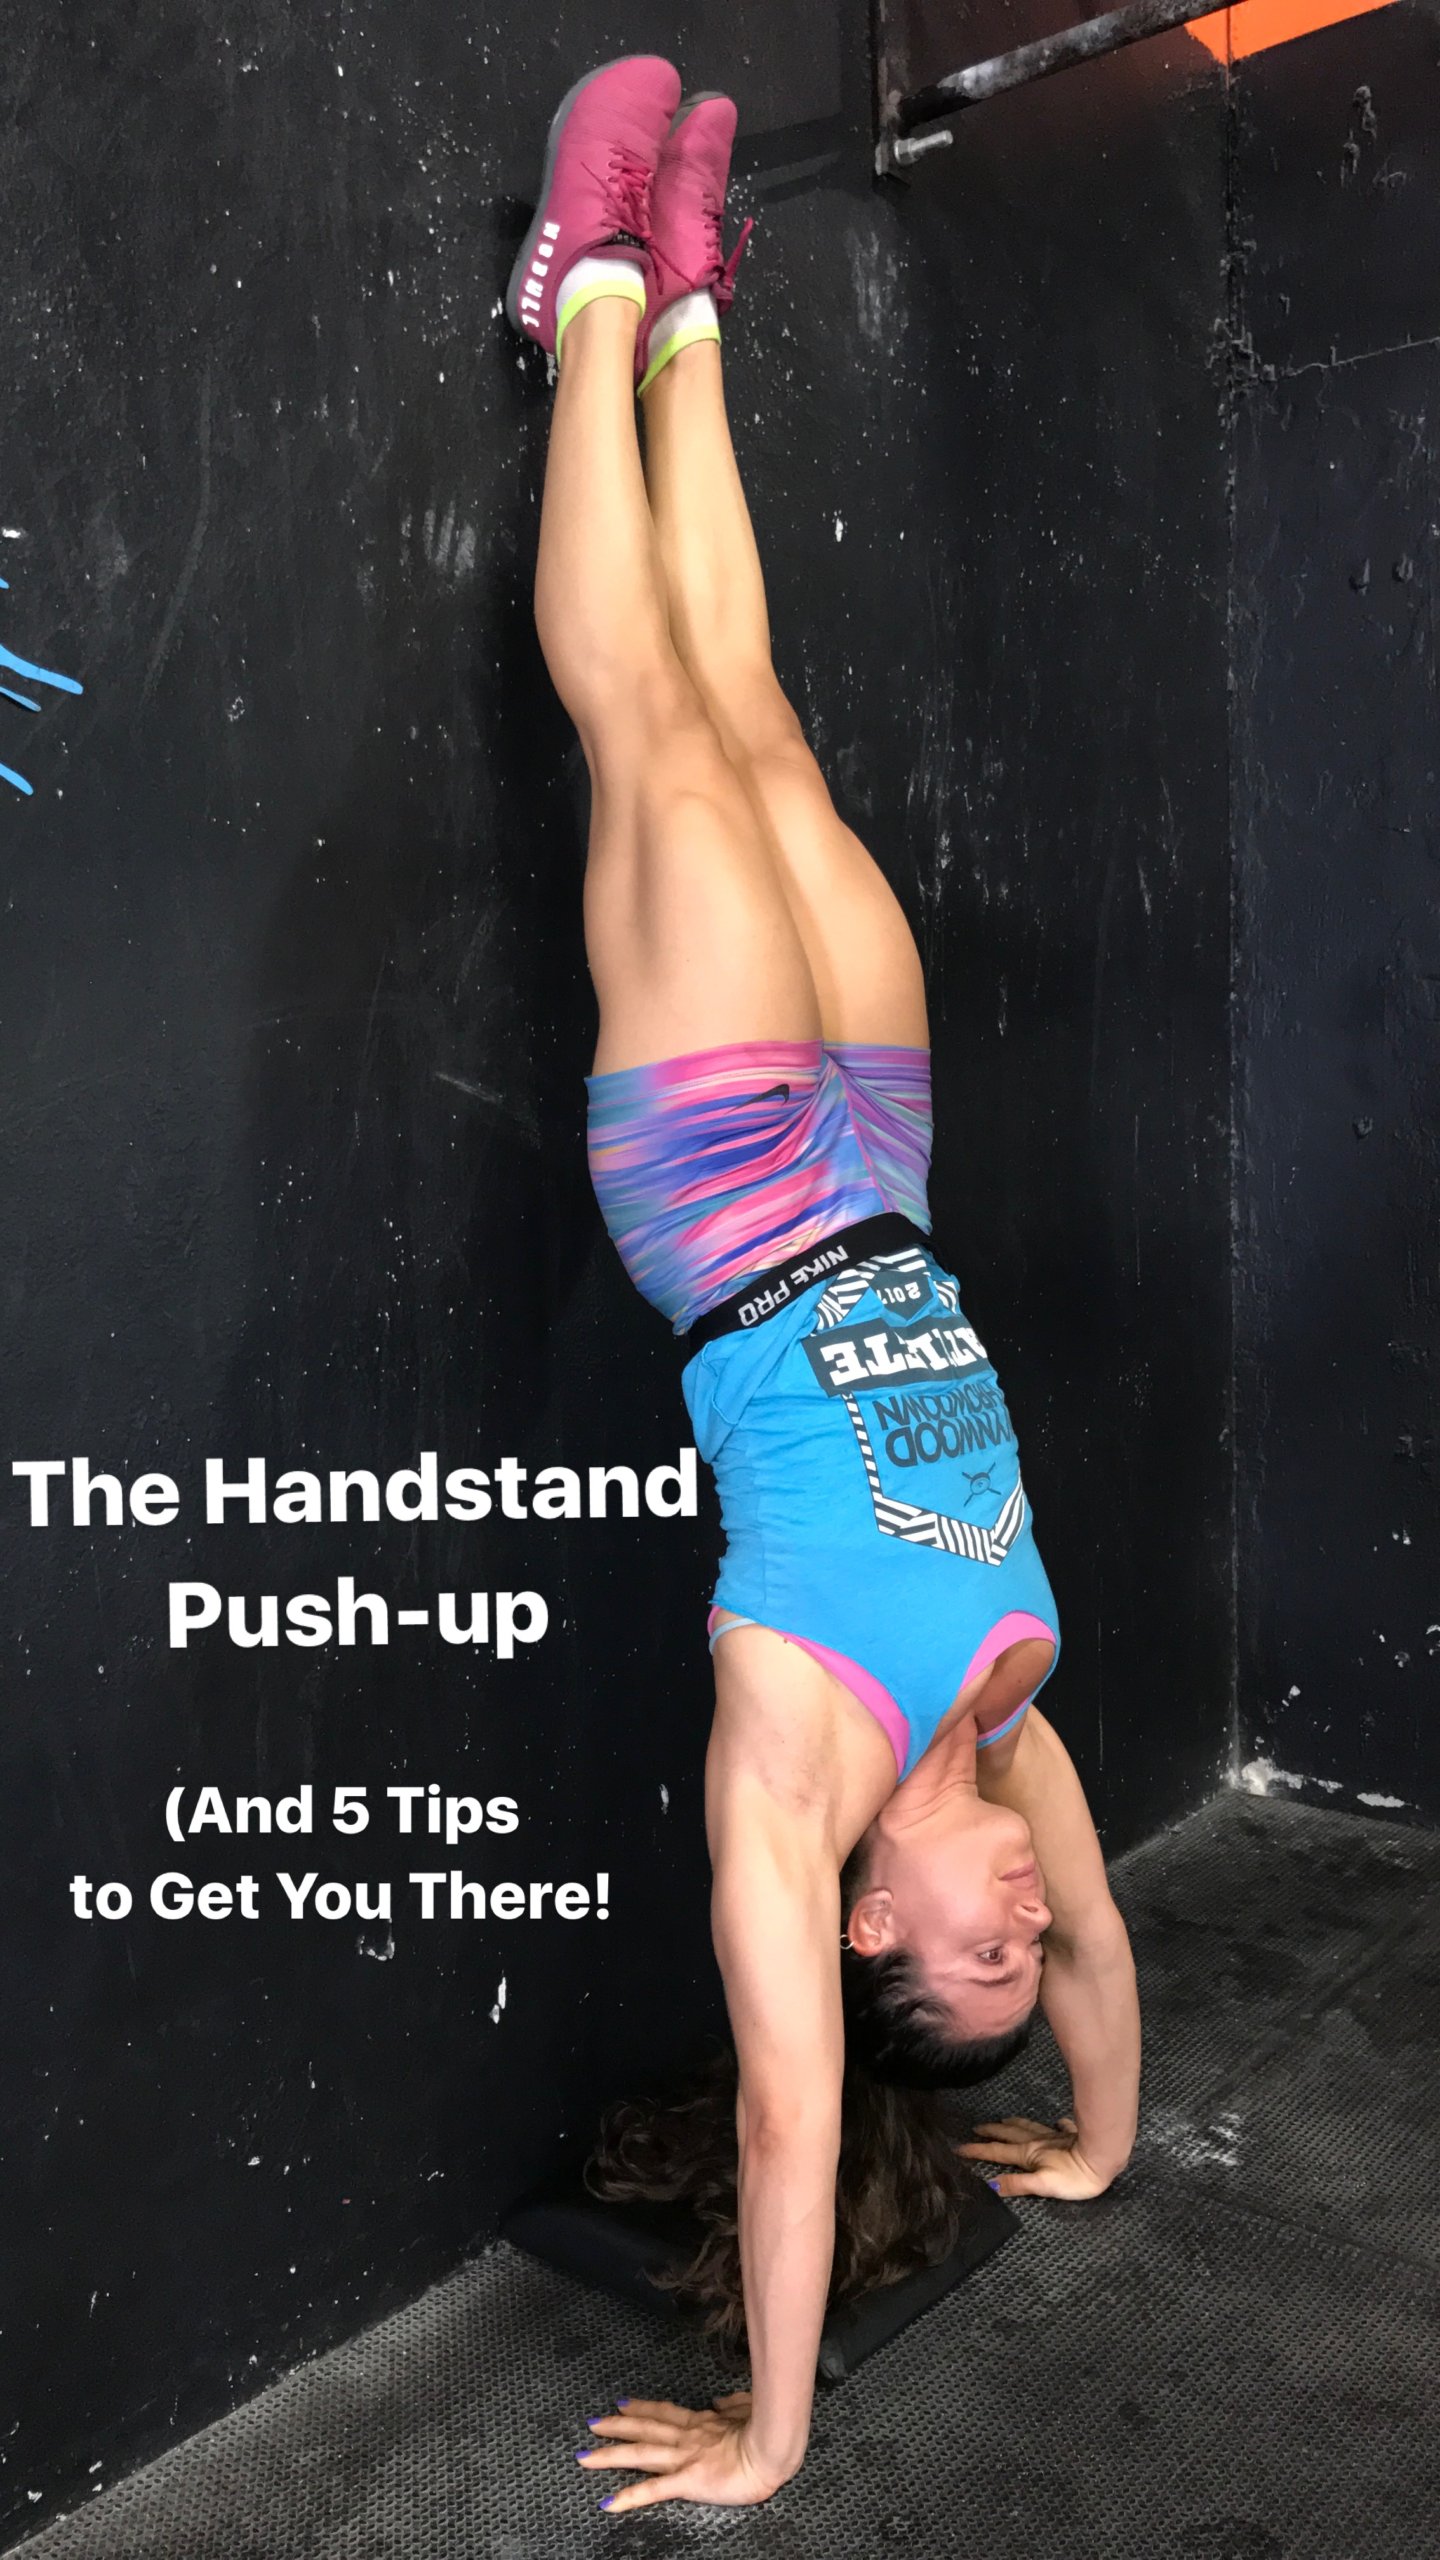
The Handstand Push-up (And 5 Tips to Help You Get There!)
I coach the weekly gymnastics class every Tuesday at 5:15p at Reebok CrossFit Miami Beach. What that means is that once I week I am helping those who want to work on getting gymnasty with a coach can do so- every week. The movements we focus on vary depending on what’s available based on the daily WOD. Last week we focused on Handstand Push-ups. Tips and tricks to make them quicker, easier and just better all around.
While it’s cool to make those moves more efficient once you can do them what about everyone who is still working towards them? I totally understand. I remember when I first started CrossFit and I would see people doing all these cool things and I dreamed of the day I could do them too. So all of those who are still trying have a special place in my heart. As I feel it is always important to build on the foundations we are going to build up to doing a strict handstand push-up before we get into the kipping ones.
So, without further ado, here are 5 tips to help you get a handstand push-up:
1. Are you comfortable being upside down and can you support your weight?
There’s zero sense trying to learn a handstand push-up if you are uncomfortable being inverted and/or if you immediately fall on your head once you do get there so let’s start here. Wallwalks are a good way to determine both.
How-to:
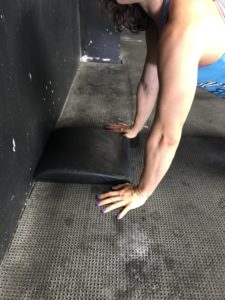
- Start lying on your belly with your feet against the wall
- From there do a push-up and start to walk yourself allllll the way up to the wall until your chest touches
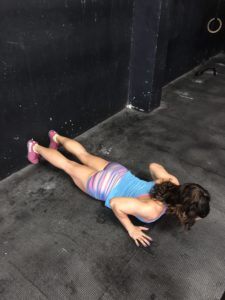
Are you comfortable here? Can you hold it for atleast :30? And walk yourself back down with control? Perfect. You’re ready for Step 2.
Are you freaking out? Then this is where I want you to start. 3-4x per week I want you to ACCUMULATE 3:00 in this wallwalk position. Track how long you are able to hold it. Maybe day one you can only hold it for :15 seconds at a time. But then maybe day 3 you can hold it for :30. But it in a note in your phone and keep it handy. Make sure you are walking a litttlleeee bit closer to the wall every week, or better yet every day. When you can comfortably touch your chest to the wall, hold it for about :30 and lower yourself down with control then you are ready for Step 2.
2. Kicking-up to the Wall
You may be asking, “If I’m comfortable upside down and I can support myself then why do I need to go over this?” Because I have seen some disastrous times when athletes have thrown themselves into the wall and come crashing down on their heads.
How-to:
- So first thing first- get an ab mat. You know what- get 2 just to be safe. Place it right up next to the wall.
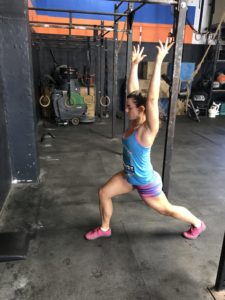
- Standing in front of the ab mat I want you to think about taking a dancer’s lunge. So your front foot is forward, arms are overhead.
- As you hinge at the hip and your hands go down, your back foot comes up. In 1 smooth motion I want you to move your arms from over head to the 2 outside front corners of the ab mat and as you do this your back heel should float up.
- Once your hands are on the ground gentle kick off with the toes of that back leg
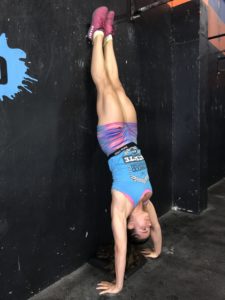
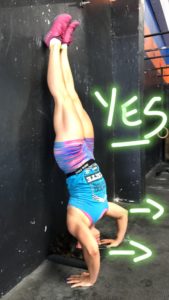
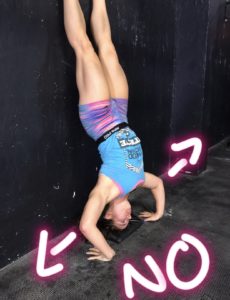
- When you are successful then your arms should be fully locked out, head “through the window” (which is just a weird way of saying your arms should be just behind your ears), line of sight is STRAIGHT ahead (you don’t want to handstand push-up onto your face now do you?) and you should have a tight belly, tight glutes, tight quads with feet together and toes pointed.
The keys here are to a. keep your arms locked out and b. to just think about that back foot coming up- NOT about ending in a handstand.
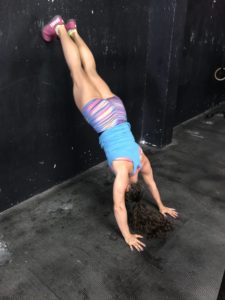
Did you make it? If not try it again and kick a little harder. If this is uncomfortable then practice 3-4 sets of 5 kick-ups every day until you can gently kick up to the wall every time. (Success means you don’t slam into the wall and bounce back, you are in a nice hollow body position, you can also gentle come down without smacking the ground and nearly breaking your ankle).
The goal is to kick up in a smooth manner and to be able to find a right, hollow body position like so (please see the photo). Once you can do this then you are ready to move on to Step 3.
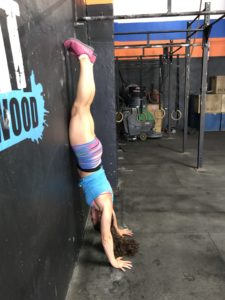
3. Holding a Handstand
At this point I just want you to practice being up there. You can do this in unison with #4 and #5 to build to the ultimate goal: A Strict HSPU. Just kick up to the wall and ensure you are maintaining proper form as you hold for sets. What I mean by this is just see how long you can hold it up there for rounds (sets). For example 3-4 times a week ensure that you accumulate 3:00 in an handstand hold. Maybe you start doing 6 sets of :30 and by week 3 you are doing 3 sets of 1:00.
Bonus! Once you are comfortable just holding the you can start to move a foot off of the wall, then switch with the other, then try both feet off the wall to work on your freestanding handstands!
4. Strict Dumbbell Presses
These are aweeeesssome awesome awesome. They will help you build the strength you need for a HSPU, improve your overhead presses- and make your shoulders look like.
How-to:
- You need 2 medium-heavy dumbbells
- Standing with your feet under your hips, make sure that you are keeping your quads, glutes and core tight
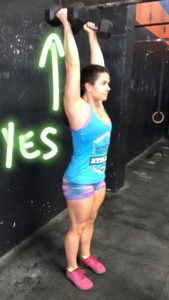
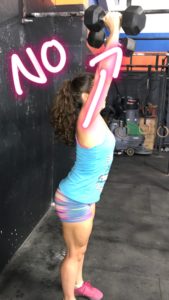
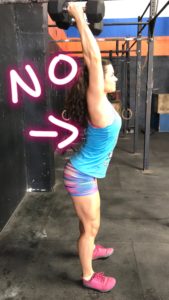
- With a dumbbell resting on each shoulder, elbows forward and thumbs pointing back, press the weights up and slightly behind you (“Head through the window” so that someone standing beside of you could see your ear)
- Return them all the way to your shoulders
- Start by doing 4 sets of 1o-12 reps. After a month go a little heavier- this time completing 4 sets of 5-8 reps
AVOID
- Pressing the dumbbells out in front of you
- Arching your back. Keep your tummy tight- like you’re trying to impress a hottie at the beach
5. Negative Handstand Push-ups
Now we’re cooking! So you love being upside down, you kick up like a graceful ninja, can hold it up there, can do strict dumbbell presses like the best globo gym goer and NOW you’re ready for more! I give you Negative HSPUs! These are one of my personal faves because we are stronger in the eccentric (negative) variation of the movement yet it allows us to still build strength for the concentric movement (a HSPU).
How-to:
- You need an ab mat (maybe 2) to start
- Kick up to the wall
- Maintaining the proper positioning bend your elbows forward to lower your head to the mat
- Once the crown of your head is on the mat simply come down
- Try doing 10-15 of these. And count slowly as you go down. Maybe you start with :03 (one one-thousand, two-one thousand, 3- one thousand) and if that is easy try going to a :04 or :05 count on the way down.
AVOID
- Flaring your elbows out
- That arched back that I mentioned earlier
So those are my tips. I hope that this help you get your first handstand push-up! And that they hopefully are some new tools for your tool box. As always, ask your coach if you have any questions as each person is their own individual snowflake. You can always ask me too if you need any clarification or would like to send me a video of you performing the move(s)! I do programming for online clients who are wanting a little bit more from their workouts and I would be happy to help you reach your goals as well! Contact me so we can make a plan for your success!

